
Painting your bedroom yourself can be a rewarding way to refresh your personal space, express creativity, and even save money. However, without proper planning and preparation, DIY projects can easily go wrong—leading to streaky finishes, uneven coverage, or paint mistakes that require touch-ups.
This guide provides practical tips and expert advice to help you complete a flawless bedroom paint job, avoid common mistakes, and achieve professional-looking results—without hiring a contractor.
Why DIY Bedroom Painting Can Be Challenging
While painting may seem straightforward, bedrooms present unique challenges:
- Small or tight spaces with furniture and fixtures.
- Ceilings, trim, and corners that require precision.
- Lighting that affects color perception.
- Prep work like patching holes, sanding, or priming.
By understanding potential pitfalls and taking the right steps, you can confidently tackle your bedroom painting project.
Common DIY Bedroom Painting Mistakes
1. Skipping Prep Work
Preparation is key to a smooth, long-lasting paint finish. Skipping cleaning, sanding, or filling holes can cause uneven surfaces, bubbles, or peeling paint.
Tip: Always clean walls with a mild detergent, patch holes with spackle, and sand rough areas before painting.
2. Ignoring Color Testing
Paint looks different in stores than in your bedroom. Lighting, furniture, and flooring affect how colors appear.
Tip: Paint small test patches on multiple walls and observe them at different times of the day to see how light impacts the color.
3. Using the Wrong Paint Finish
Flat paint hides imperfections but can be hard to clean. Glossy finishes reflect light and highlight uneven surfaces.
Tip: Use matte or eggshell finishes for walls, and semi-gloss for trims and doors for balance between aesthetics and durability.
4. Overloading Brushes or Rollers
Too much paint causes drips, uneven coverage, and wasted product.
Tip: Load a moderate amount on your brush or roller and apply in smooth, even strokes.
5. Painting in Poor Lighting
Dim or uneven lighting can make it hard to see streaks or missed spots.
Tip: Use temporary lighting or work during daylight hours to ensure an even coat.
6. Rushing the Job
Skipping primer, applying multiple coats too quickly, or rushing the drying process leads to subpar results.
Tip: Follow recommended drying times between coats and allow primer to fully cure before painting.
Step-by-Step DIY Bedroom Painting Tips
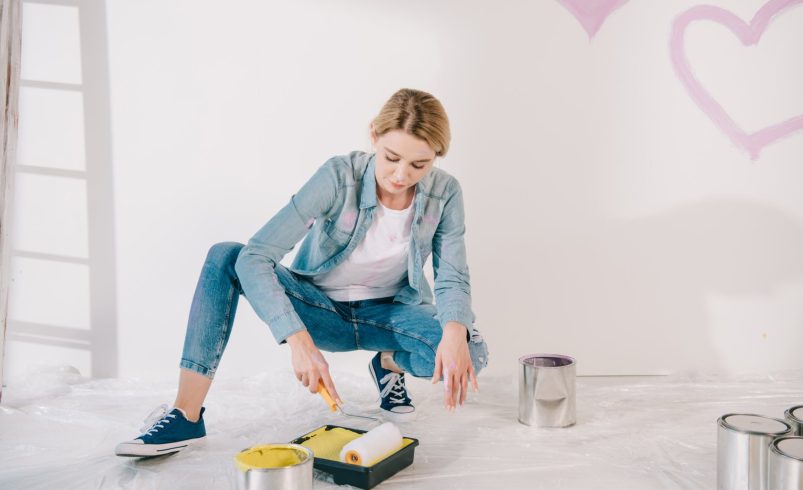
Step 1: Gather Supplies
Essential tools for a smooth DIY painting project:
- Quality paint and primer
- Angled brushes for edges and trims
- Rollers and trays
- Painter’s tape
- Drop cloths or plastic sheeting
- Spackle, sandpaper, and putty knife
- Step ladder for high walls or ceilings
Step 2: Prepare the Room
- Remove furniture or push it to the center and cover with drop cloths.
- Remove outlet covers, switch plates, and wall hangings.
- Protect flooring and window sills with tape or cloth.
- Patch holes, sand rough areas, and clean walls thoroughly.
Step 3: Prime the Walls
Priming ensures better adhesion, even color, and a smoother finish, especially over dark colors or patched areas.
Tip: Use a primer that matches your final paint type for best results.
Step 4: Cut In First
Using an angled brush, paint along trim, ceilings, corners, and around windows and doors. Cutting in first ensures crisp lines and reduces the risk of rolling paint onto areas you don’t want painted.
Step 5: Roll the Walls
- Use a roller with the correct nap length for your wall texture.
- Apply paint in “W” or “M” motions to distribute evenly.
- Work in sections and maintain a wet edge to avoid streaks.
- Apply two coats for a smooth, professional finish.
Step 6: Accent Walls and Details
If adding an accent wall or pattern:
- Ensure the base coat is fully dry.
- Use painter’s tape for stripes or geometric patterns.
- Consider stencils for murals or decorative designs.
Step 7: Paint Trim and Doors
Trim and doors usually require a semi-gloss or gloss finish. Take your time to avoid drips or uneven lines.
Step 8: Clean Up
- Remove painter’s tape while paint is slightly wet.
- Wash brushes, rollers, and trays for future use.
- Safely store leftover paint or dispose of it according to local guidelines.
Additional DIY Tips for a Perfect Bedroom Paint Job
- Work Top to Bottom: Start with the ceiling (if painting), then walls, and finish with trims.
- Use Quality Tools: Cheap brushes and rollers often leave streaks or bristles in the paint.
- Ventilation: Ensure proper airflow to help paint dry faster and reduce fumes.
- Take Breaks: Painting can be physically demanding—frequent breaks reduce mistakes caused by fatigue.
- Layer Colors Gradually: If using dark colors or multiple shades, apply in light, even layers.
When to Consider Professional Help
DIY painting can save money, but some situations benefit from professional expertise:
- High ceilings or complex architectural features
- Large or heavily textured walls
- Intricate trim or decorative moldings
- Desire for a flawless finish without errors
Chicagoland Paint Pro Tip: Even if you plan to paint yourself, a color consultation with a professional ensures your bedroom palette looks perfect and complements your home décor.
Final Thoughts
DIY bedroom painting is rewarding, but careful planning, preparation, and attention to detail are crucial for success. Avoiding common mistakes such as skipping prep, rushing, or choosing the wrong finish can make the difference between a professional-looking room and a disappointing result.
With the right tools, quality paint, and these expert tips, you can transform your bedroom into a relaxing, cozy haven that reflects your personal style. Painting is more than just a home improvement project—it’s an opportunity to create a space that promotes rest, comfort, and inspiration every day.