
Cabinet glazing is a classic finishing technique that adds depth, dimension, and character to your kitchen cabinetry. Unlike paint alone, glazing accentuates details like moldings, panels, and edges, giving cabinets a sophisticated, timeless appeal. Whether your style is traditional, rustic, or modern, the right glazing technique can elevate your kitchen design. In this guide, we’ll explore professional glazing techniques that create stunning, long-lasting results.
1. Understanding Cabinet Glazing
Glazing involves applying a translucent layer of tinted paint or glaze over a base color to highlight architectural details and create depth.
- Purpose: Enhances textures, emphasizes carvings, and gives cabinets an aged or classic look.
- Styles: Can range from subtle and modern to dramatic and antique.
Pro Tip: Glazing is ideal for raised-panel cabinets, decorative moldings, and intricate details that benefit from depth and shadow.
2. Prepare Cabinets for Glazing
Preparation is crucial for a flawless finish:
- Remove cabinet doors, drawers, and hardware.
- Clean surfaces thoroughly to remove grease, dirt, or old finishes.
- Sand lightly to smooth imperfections and ensure glaze adhesion.
- Apply your base paint color and allow it to dry completely.
Pro Tip: A smooth base coat ensures the glaze applies evenly and highlights details beautifully.
3. Choosing the Right Glaze
- Oil-Based Glaze: Provides rich color and smooth application; ideal for deep, classic effects.
- Water-Based Glaze: Easy cleanup, faster drying, and lower odor.
- Gel Glaze: Thick, ideal for vertical surfaces and controlled application.
Pro Tip: Select a glaze color slightly darker than the base coat for subtle depth or contrasting colors for a bold effect.
4. Tools for Glazing
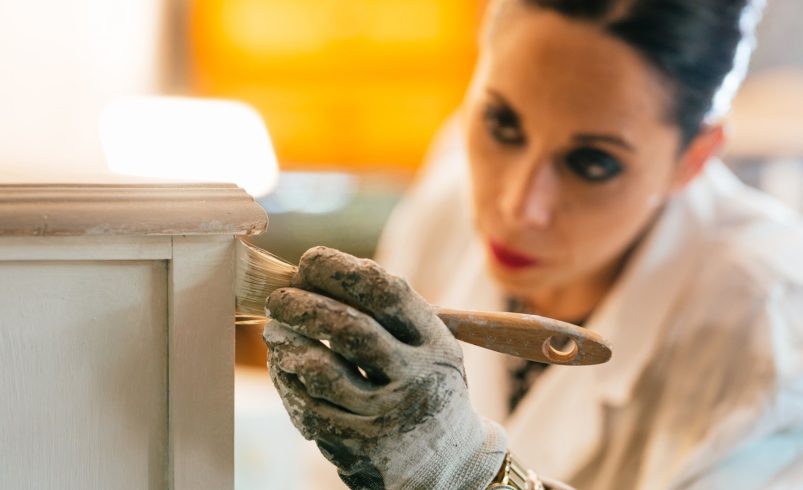
- Brushes: Soft bristle brushes work well for detailed areas.
- Rags or cloths: Used to wipe and blend glaze for a natural finish.
- Foam brushes: Ideal for larger, flat surfaces to prevent streaks.
- Sponges: Great for texture effects and antique finishes.
Pro Tip: Test your glaze on a hidden panel to perfect your technique before applying to the entire cabinet.
5. Techniques for Applying Glaze
- Dry Brush Technique: Lightly dip a dry brush in glaze and sweep over edges and raised panels for subtle highlights.
- Wipe-Off Technique: Apply glaze over the surface, then wipe off excess with a cloth to reveal details and shadows.
- Antiquing Technique: Apply glaze unevenly to give cabinets an aged or distressed look.
- Layering: Apply multiple glaze layers with different tones for a rich, multidimensional effect.
Pro Tip: Work in small sections and blend as you go to maintain consistency.
6. Enhancing Cabinet Details
- Glazing works best on moldings, panels, and carved details.
- Highlight corners, edges, and raised areas for added dimension.
- Use a lighter glaze over dark base paint or a darker glaze over light paint for contrast.
Pro Tip: Subtle glazing can look timeless, while bold glazing creates a striking, statement finish.
7. Seal the Glaze for Longevity
- After glazing, apply a protective topcoat (polyurethane or water-based clear coat) to seal and protect the finish.
- Thin, even layers prevent streaking and preserve the glaze.
- Lightly sand between coats for a smooth, professional look.
Pro Tip: A topcoat ensures your glaze resists wear, moisture, and kitchen traffic.
8. Mistakes to Avoid in Glazing
- Applying glaze on dirty or unprepared surfaces.
- Using too much glaze at once, causing blotches.
- Ignoring drying times between layers.
- Skipping protective topcoat.
- Not testing glaze techniques before full application.
Pro Tip: Patience and preparation are key to achieving a polished, timeless glaze finish.
9. Combining Glaze With Other Techniques
- Two-tone cabinets with glaze on raised panels create depth and visual interest.
- Glazing over distressed cabinets enhances antique charm.
- Layer glaze with metallic accents for luxurious finishes.
Pro Tip: Combining techniques should be subtle—too many effects can overwhelm the kitchen’s design.
10. Professional Advice for Timeless Results
- Professionals can ensure even glaze coverage and consistent color.
- Expert painters use advanced techniques like layering, antiquing, and controlled wiping for a flawless finish.
- Professional sealing maximizes durability and maintains the cabinet’s beauty over time.
Pro Tip: Even a subtle glaze applied correctly elevates your kitchen from ordinary to elegant and timeless.
Conclusion
Cabinet glazing is a powerful tool to transform your kitchen cabinets, adding dimension, depth, and timeless beauty. Proper preparation, high-quality glaze, and professional techniques ensure a polished, durable finish that highlights every detail. For expert advice and flawless application, Chicagoland Paint Pro provides professional glazing services that enhance your cabinets and elevate your kitchen’s design.