
Staining your kitchen cabinets can dramatically enhance their natural beauty and transform your entire kitchen. However, achieving a smooth, professional finish requires more than just applying stain—proper technique, preparation, and attention to detail are essential. This guide will walk you through expert staining techniques to give your cabinets a flawless, long-lasting finish.
1. Gather Your Materials
Before you begin, make sure you have all the tools and materials:
- Sandpaper (120–220 grit) and sanding block
- Degreasing cleaner or mild soap
- Wood stain (oil-based, water-based, or gel stain)
- Brushes, foam applicators, or clean cloths
- Painter’s tape and drop cloths
- Protective gloves and mask
- Wood filler (if needed)
- Clear topcoat (polyurethane or lacquer)
Pro Tip: Investing in high-quality brushes and foam applicators ensures smooth, streak-free application.
2. Prepare the Cabinets
Preparation is critical for a professional finish:
- Remove all cabinet doors, drawers, and hardware.
- Clean surfaces thoroughly to remove grease, dirt, and dust.
- Sand cabinets lightly to smooth surfaces and remove old finishes.
- Fill any dents or scratches with wood filler, then sand smooth.
Pro Tip: Always test the stain on a hidden section to see how the wood absorbs it before applying it to the entire cabinet.
3. Choose the Right Application Method
The application method affects both the appearance and smoothness:
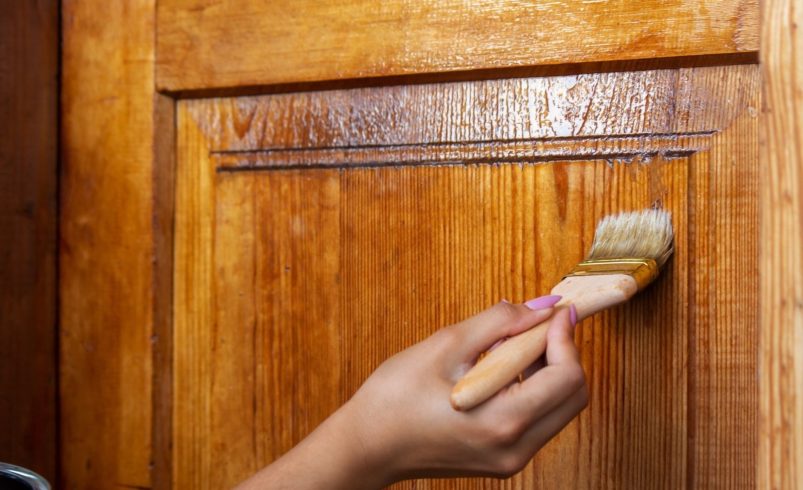
- Brush: Ideal for edges, corners, and detailed panels.
- Foam applicator: Great for flat surfaces to avoid brush marks.
- Cloth: Useful for wiping gel stains for a uniform look.
Pro Tip: Always apply stain in the direction of the wood grain for a natural, seamless finish.
4. Apply Stain in Thin, Even Coats
- Pour a small amount of stain onto the wood.
- Work in sections, applying a thin, even coat with your chosen tool.
- Wipe off excess stain immediately with a clean cloth for a consistent color.
Pro Tip: Multiple thin coats are better than one thick coat—they prevent blotching and allow better control of color intensity.
5. Allow Proper Drying Time
- Oil-based stains: Typically 8–24 hours depending on temperature and humidity.
- Water-based stains: Usually 2–4 hours.
- Gel stains: Dry 6–12 hours before applying a topcoat.
Pro Tip: Avoid rushing the drying process; touching wet or tacky surfaces can ruin the finish.
6. Sand Between Coats for Smoothness
- Lightly sand with fine-grit sandpaper (220 grit) between coats to remove raised grain or dust particles.
- Wipe surfaces with a tack cloth before applying additional coats.
Pro Tip: Sanding between coats gives a factory-like, professional finish.
7. Apply a Protective Topcoat
- A clear polyurethane or lacquer protects cabinets from wear, moisture, and stains.
- Apply thin, even coats and allow each coat to dry completely.
- Sand lightly between coats if multiple layers are needed.
Pro Tip: Satin or semi-gloss topcoats are best for kitchen cabinets—they’re durable and easy to clean while providing a polished look.
8. Special Techniques for Custom Effects
- Two-Tone Cabinets: Apply a darker stain to lower cabinets and a lighter stain to upper cabinets for contrast.
- Distressed Finish: Lightly sand edges after staining for a rustic, vintage look.
- Glazed Cabinets: Apply a glaze over the stain for depth and texture.
Pro Tip: Experiment on scrap wood before trying advanced techniques on your cabinets.
9. Avoid Common Mistakes
- Applying stain on dirty or greasy surfaces.
- Using too much stain at once, causing blotches or drips.
- Skipping sanding or prep work.
- Rushing drying time between coats.
- Forgetting to protect surrounding areas—stain can easily spill or splatter.
Pro Tip: Attention to detail during preparation and application makes all the difference in achieving a professional finish.
10. Reassemble and Enjoy Your Cabinets
- Once the topcoat is fully dry, carefully reinstall doors, drawers, and hardware.
- Check hinges and alignment for smooth operation.
- Enjoy the enhanced warmth, depth, and beauty of your freshly stained cabinets.
Pro Tip: Regular cleaning with a soft cloth and mild cleaner preserves your cabinets’ professional finish for years.
Conclusion
Mastering cabinet staining techniques can transform your kitchen from ordinary to stunning. By carefully preparing surfaces, applying stain in thin, even coats, sanding between layers, and using a protective topcoat, you can achieve a professional, long-lasting finish. Whether you prefer a classic, modern, or rustic style, Chicagoland Paint Pro provides the expertise and guidance to help you achieve flawless stained cabinets that elevate your kitchen’s look and feel.